Chestnut Mushrooms.
Taste The Magic
Good Food | Bold Flavor
What Is A Chestnut Mushroom?
As one of the most popular edible mushrooms in the world, the chestnut mushroom (Pholiota adiposa), or cinnamon cap mushroom are found in the wild, they are one of the easiest mushrooms for beginners to cultivate. Pholiota means scaly in Latin, while adiposa means grease or lard. These mushrooms have scaly caps with a greasy surface. Water make the caps slimy.
Most chestnut mushrooms grow on beech trees, although they can also grow on oaks and poplars. In addition to sauteeing, grilling, and roasting them, they can be used in soups, stews, risotto, pasta dishes, and more. As a result of their meatier texture and richer taste, they are often preferred in recipes that showcase their flavor.
Chestnut Mushroom Taxonomy
| Kingdom | Fungi |
| Phylum | Basidiomycota |
| Class | Agaricomycetes |
| Order | Agaricales |
| Family | Strophariaceae |
| Genus | Pholiota |
| Species | P. adiposa |
Why is it called a chestnut mushroom?
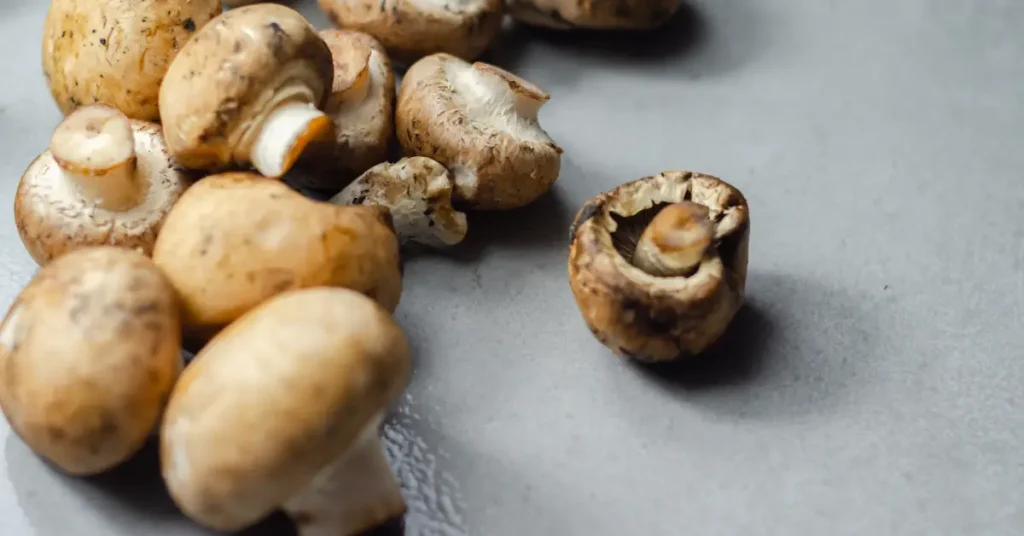
As its name suggests, chestnut mushrooms are named after the edible nuts found on chestnut trees, which have a similar appearance and color to chestnuts. They are brown in color, usually with a slightly lighter cap, and they are reminiscent of the color of chestnuts due to their brown hue. Due to the distinctive cinnamon-brown color of their caps when mature, they are commonly called chestnuts. Yellowish scales or cracked appearance are standard features of the cap. When mature, chestnut mushrooms have a rounded cap that flattens out, reaching 2-8 cm in diameter.
As a result, the names “chestnut mushroom” and “cremini mushroom” refer to the mushroom’s color and appearance, allowing people to distinguish it from other types of mushrooms, such as white button or portobello mushrooms.
History
Historically, chestnut mushrooms have been consumed and used as edible wild mushrooms. It is said that ancient peoples like the Romans foraged for these tasty mushrooms. Their harvesting was widespread throughout Europe, where they grew wild on beech trees.
Throughout North America, Europe, and Asia, chestnut mushrooms grow wild on decomposing hardwood logs and stumps. Chestnut mushrooms were once primarily foraged foods, but modern farming methods have allowed them to become a reliable crop. Clusters are made up of bunches of mushrooms. Clusters of mushrooms consist of several sprouts growing from the same location.
With chestnut mushroom spawn available today, home cultivators can grow these mushrooms around the house very easily and with minimal equipment. A beginner can now cultivate nutritious and flavorful chestnut mushrooms without requiring access to wild specimens.
Ecology
The chestnut mushroom thrives in a variety of environments, resulting in its versatility and resilience. Generally, chestnut mushrooms grow on dead beechwood but can also grow on poplars, oaks, and other dead hardwoods. A saprobic white-rot fungus, Pholiota adiposa mainly depends on dead wood for its nutrition. However, it can also show weak parasitic behavior, especially if the beech tree is weak. This mushroom can usually be found during the late summer or fall.
Appearance
Pholiota adiposa, or chestnut mushroom varies from reddish-brown to chestnut brown. Chestnut mushroom caps have small, tightly packed scales. Initially, the gills are yellow, but as the spores mature, they change to a rusty brown color. It produces rusty brown, elliptical to spindle-shaped spores.
Caps
The convex caps are brownish-yellow to rust-orange in color, and have a diameter of about 2 to 4 inches. They have dense brown scales. The scales of younger chestnut mushrooms are covered with frilly white veil fragments.
- Gills:
The yellow-tan gills turn orange-reddish-brown as the spores form.
- Stems:
The stems are round and pale yellow to tan with a diameter between 0.2 and 0.4 inches (5-10 mm) and a height between 1 and 2.5 inches, with its scales often overlapping at the base.
Identification
Chestnut mushrooms are identified by their convex brown caps and medium size. This fungus produces clusters of mushrooms with golden to chestnut-brown caps. There are brown scales on the caps that become increasingly dense toward the center of the cap. Numerous white plates are present on the cap. In some cases, the chestnut mushroom can grow 3-10 cm in diameter.
Taste
With their meatier texture and stronger flavor, chestnut mushrooms are a popular ingredient in dishes that allow their flavor to stand out. Although their outer shells break when cooked, these tasty mushrooms retain their crunchiness, adding flavor to even average dishes.
Cooking can enhance the natural flavors of mushrooms, which are often more pronounced when cooked.
Furthermore, when roasted or grilled, their flavor deepens, making them an excellent addition to many dishes.
Characteristics of Chestnut Mushrooms
| Feature | Description |
| Cap Color | Earthy brown, Pale orange |
| Cap Diameter | Varies, typically between 3-10 centimeters |
| Stem Color | White or pale, sturdy and fibrous |
| Gills | Dark brown, closely spaced beneath the cap |
| Pores | White` |
Is it safe to eat chestnut mushrooms?
Yes, chestnut mushrooms are safe and enjoyable to eat. Around the world, they are one of the most common types of edible mushrooms. As they have a richer flavor and meatier texture than some other types of mushrooms, they are a popular cooking ingredient.
When foraging for wild mushrooms, it’s essential to understand mushroom identification to avoid ingesting poisonous or toxic mushrooms. Chestnut mushrooms cultivated from reputable sources are generally safe to consume.
Health Precautions
While Pholiota Adiposa mushrooms are healthy, if you try them for the first time, make sure to take some precautions to avoid health symptoms.
As a result, you should:
- Make sure you cook thoroughly.
- If you are trying mushrooms for the first time, eat a small amount.
- Check how your body responds after a few days.
- Growing mushrooms at home should be done outdoors since airborne spores (that are found in mushrooms) can sometimes cause respiratory irritation.
Chestnut Mushrooms Cultivation
Various methods are available for growing these culinary delights. Whether you use a commercially produced growing kit or a decaying tree stump in your backyard, this tasty treat is easy to grow.
You can grow them in your backyard or at home.
The list of 5 methods is given below. You can adopt any of the below method that matches best to your criteria.
- Indoor cultivation using grow bags.
- Use composite mix and spore injection method.
- Multi-flush harvesting.
- Outdoor cultivation ( raised beds method).
- Outdoor cultivation (in Logs)
Before elaborating each method and its processing step. One should have to know about key essentials or key equipments that you must have to start cultivation.
Key Essentials For Growing Chestnut Mushrooms
Environment
Clean and sterilized environment is the most important factor to control and avoid fungal and bacterial contamination throughout the process.
The use of sterilized equipments, sanitized working space and laminar flow hoods help you prevent such problems.
Temperature and humidity
- For efficient mycelium growth the temperature must be in the range of 24-27°C while for fruiting period the temperature should be drop to 13-21°C.
- On the other hand highly humid environment is recommended for mycelium growth i.e. 90-95% while for fruiting period the humidity must be reduced about 85%.
Ample lightening and air circulation
Ample lightening or low intensity light is enough for chestnut mushrooms. But air circulation play an integral part in mushroom development by removing carbondioxide.
Growing Chestnut Mushrooms at Home: indoor
Mushroom Grow Kits
Mushroom grow kits are convenient and user-friendly systems for cultivating mushrooms at home without the need for extensive knowledge or specialized equipment. There are clear instructions and step-by-step directions on how to set up and care for the kit. Individuals with little to no experience in mushroom cultivation can take advantage of them. These kits typically include all the necessary components for successful mushroom cultivation, including substrate (aka growing medium), spawn (mycelium-inoculated material), and a grow bag or container. Many kits come pre-inoculated with mushroom spawn, significantly shortening the cultivation process.
Cultivating mushrooms year-round using mushroom grow kits for indoor cultivation is possible. Therefore, they are an excellent choice for individuals who do not have access to outdoor space or for those who live in urban areas or harsh climates. As a result of the mushroom species and the growing kit, the harvest and growing time varies.
Mushroom Growing: Substrate
Get the mushroom spawn
Start by purchasing mushroom spawn, a live culture. A mushroom’s spores are its “seeds” or reproductive bodies. They are typically harvested from a mushroom’s underside. Spores contain all the elements necessary for the growth of new fungi. When the spores germinate, they form a network of cells known as the mycelium. As the mycelium grows, it is transferred onto the substrate, a substance that promotes and supports its growth. As a whole, the spawn consists of mycelium and substrate.
Choose your substrate
Growing mushrooms requires a substrate, otherwise known as “soil,” which act as the growing medium. An enriched sawdust substrate is the best substrate for fruiting chestnut mushrooms. The supplemented sawdust is packed into mushroom grow bags with integrated filter patches. The sawdust provides nutrients, whereas the bags facilitate the harvesting process. To grow chestnut mushrooms at home, you need the proper mushroom substrate.
Culture inoculation on sterilized grains
Once you have chosen a substrate, inoculate it. The substrate can be made from peat moss, potting soil, and compost. A sterilized grain like rye, millet, or sorghum provides nourishment to the spawn during colonization. Mix spawn into the jarred grains following sterile procedures to inoculate them. The process is known as a grain-to-grain transfer. Keep inoculated jars at a temperature between 70 and 75°F. You should use 5cc of inoculate per 1qt jar of sterilized grains if you use a liquid culture.
Conditions:
As the white mycelium spreads throughout the sterilized grain jar, it signals that colonization has been completed. The temperature around 70-75°F helps speed up colonization. Seal the colonizing grain jars to prevent contamination.
Transferring colonized grain spawn to sterile sawdust
Upon colonization of the grains, the spawn can be transferred to pasteurized, enriched sawdust to colonize the new substrate. The grain spawn should be evenly distributed through the sawdust. It is important to mix thoroughly to disperse the mycelium. Ensure that the bags are 3/4 full so that mushrooms have ample room to grow.
Initiate fruiting conditions
The sawdust bags are ready for fruiting once they are colonized. By exposing bags to cooler temperatures (60–65°F), you can initiate pinning and mushroom formation. Mushrooms produce carbon dioxide and will suffocate if they don’t have enough oxygen. Chestnut mushrooms require moisture to grow. Consider using a plastic garbage bag as a humidity tent if your mushroom-growing location is very dry. Slice some holes through the plastic to allow adequate ventilation. Make sure bags are opened and misted as needed to provide humidity and fresh air exchange.
The mushroom pins form within a week or two, growing rapidly into fully mature mushrooms. After flushing, mushrooms will be produced for 1-2 months before the substrate is depleted.
Harvest your chestnut mushrooms
Once the pinheads have formed, your mushrooms should be ready within a week. When you are prepared to harvest the mature chestnut mushrooms, gently twist or pull them away from the substrate. Pull out just enough soil to encourage mushroom sprouting, but don’t remove too much. You will be able to harvest the new crop in a week or two. Following the exhaustion of the substrate, harvests will decrease. Then, you’ll either need to buy a new kit or make a new spawn.
Comparison of Chestnut Mushroom Cultivation Parameters:
| Aspect | Chestnut Mushrooms | Common Varieties (e.g., Button Mushrooms) |
| Optimal Temperature | 55-75°F | 60-70°F |
| Substrate | Straw-based | Compost and manure mix |
| Fruiting Time | 2-3 weeks | 3-4 weeks |
| Harvest Yield | Moderate | High |
Composite Mix and Spore Injection Method
This method involves to provide a nutrient rich medium that is conductive for the growth of Pholiota adioposa (chestnut mushroom). Carefully prepare a blend of composite mix this may include range of organic materials like straw, wood chips, gypsum, cottonseed meal/ soybean meal, calcium carbonate and obviously a good amount of water to make it into homogenous mixture. Blend organic material with water and then sterilize it by providing high heat to ensure the elimination of potential contaminants. Avoid immediate cooling. Let it cool gradually. Composite mix is ready. Follow the mentioned below steps:
Inoculation
Use sterilize grow bags or trays for substrate preparation (composite mix).inject the mushroom spore solution into substrate using sterilized syringe, this would start mycelium growth.
Note: spores can be taken from mature mushroom present under the cap. Put out the spores using spatula or any other tool, mix it with water, making a runny solution to inject easily into the substrate. This phase go take about 2-4 weeks to grow colonies of mycelium.
Fruiting phase
This phase takes 1 – 2 weeks. Just maintain the temperature and humidity conditions throughout the phase. Indirect sunlight must be provide for efficient fruiting.
Harvesting
Use sterilized tools for harvesting. You can harvest when caps are fully grown but not opened.
Post-harvest care
You can now store your crop in cool, humid area. You can reuse these bags and trays by rehydrating and re inoculating for consequent flushes.
Multi-Flush Harvesting
This method is used to provide continuous cultivation environment for the substrate so that multiple flushes from single medium yield out without pausing or interrupting the process.
For this just follow the mentioned simple steps:
Inoculation
After maintaining a continuous environment that can conduct multiple flushes. Inoculation can be done by introducing mushroom spawn in the substrate.
Fruiting phase
This phase takes multiple weeks giving out multiple flushes. Just maintain the healthy environmental condition like temperature and humidity and sufficient lighting throughout the phase for efficient fruiting.
Harvesting
Harvesting method is little bit different from other methods. In this you have to harvest the yield in multiple rounds once mature.
Post-harvest handling
After harvesting store each yield in proper conditions to ensure the quality. The most important thing is to maintain the substrate condition in order to continue the cultivation outcomes.
Outdoor Cultivation: Raised Bed Method
The idea of growing mushrooms outdoor by designing raised beds in your garden is the worth while option to consider for the beginners. Because these mushrooms can grow well in the beds when you provide a moist environment.
Before discussing cultivation steps. Firstly have a look on what are raised beds? And how can we construct them outdoor?
What are raised beds?
Raised beds are refer to as gardening or farming bed that can be designed by adding some sort of soil which is better for mushroom growth. These beds are surrounded by cardboard or metal to give it square or rectangular shape just above the floor for proper drainage. They can be designed with varying heights according to the requirement or space available. These kinds of bed play an integral part in managing and organizing the crop by providing a good space for harvesting cultivating and planting your desired crop. The most common uses of raised beds include the cultivation of vegetables, flowers and fruits.
Construction of raised beds:
- First of all just select an outdoor area that is good enough to construct a bed.
- After choosing the area, make a boundary of cardboard into square shape. Cardboard help keep it moist.
- Now start filling up your bed with wood chips by making first layer with wood chips (any kinds of wood chips can be utilize except those chemical treated). Just set the layers like a fruit custard. First layer of wood chips then mushroom spawn.
- Just try to wrap the spawn between wood chips layers so that spawn feed on wood chips and will begin to grow in the upcoming months.
- When you done with making 3 alternate layers of mushroom spawns and wood chips, now it’s time to cover up the bed with straw. The straw layer help in keeping it moist throughout the process as well as keep it warm in winter weather.
- Add plenty of water to keep it moist for the initial growth days and weeks.
Reminder: Place the bed where you can easily water it in days and months, your bed must not be dry out any way.
- You can keep your bed under a shady place to avoid extraneous matter that interfere growth of mycelium.(not necessary)
- Now your bed is all set to grow yield of mushrooms. You have to provide good maintenance to ensure health and growth to your raised beds for prolong yields.
Cultivation involves following major steps.
Inoculation
Once you prepared bed outside your home for cultivation. The spawn are introduced for to colonize it into mycelium.
Fruiting phase
The fruiting phase will go for 3 to 4 weeks until you see first few whitish mycelium grow. The temperature and humidity conditions with adequate lighting must be followed for better yield.
Harvesting
The right time to harvest them is before they attain a bigger size. The caps must not open too wide as the open caps are prone to insect attack. Young mushrooms are more delicious undoubtedly.
Postharvest handling
To keep your bed fresh and alive all the year round just add new and minty layers of woodchips. No need to prepare all lasagna layers. This will give you continuous yields of mushrooms.
After harvesting keep mushrooms in cool dry place to keep it fresh.
Outdoors Growing: Logs
Chestnut mushrooms can also be grown outside on stumps and logs with plugs, sawdust spawn, or grains, however, go with maple or oak logs for the best results. Getting your first flush of mushrooms from growing mushrooms on logs takes around a year. However, you’ll be able to get chestnut mushrooms for several years to come.
Prepare the logs by cutting them into manageable lengths of 12-20 inches (30-50 cm). Let the logs age until they begin decomposing slightly after removing any loose bark. Logs should be drilled 4-6 inches (10-15 cm) apart and 0.8-1.2 inches deep. Put the spawn plugs inside the holes and seal them with beeswax to prevent contamination.
Make sure the inoculated logs are stacked in a shaded area, away from direct sunlight. Air should flow between the logs as they are arranged. Water or soak the logs regularly to keep them moist. Colonization of the mycelium will occur over time. Environmental conditions determine how long this colonization process takes. Eventually, chestnut mushrooms, or pins, will appear in small clusters on the logs. Fruiting requires a constant level of moisture and shade.
When the mushrooms reach a desired size and the caps have flattened out completely, harvest them. Harvest mushrooms by twisting or cutting the stem at their base. It is best to leave some smaller mushrooms so they can grow and flush in the future. A natural and sustainable method of growing chestnut mushrooms is to cultivate them in the open on rotting wood.
Maintenance and Care
Growing chestnut mushrooms can be challenging; you should practice as much patience as you can. When you don’t see any pins after a week, you should consider moving your plant to a new spot within the same room or cutting a new fruiting spot.
Mushroom cultivation is a challenging endeavor; don’t give up if your first attempts are unsuccessful. Spray the mist over the grow stick and the perlite instead of directly spraying the mushrooms. You can rehydrate the perlite with your mister if it appears dry, and don’t worry about adding additional moisture at any point.
Insects Pests Chestnut Mushrooms
Insects pests management is crucial for chestnut mushrooms. Fungus gnats, phorid flies, springtails, and beetles are the monsters that can damage the whole crop if not taken care properly.
Phorid fly
These are extremely small in size with black eyes, their larva feed on mycelium, and their growth season comes between September and October. The adult flies start laying eggs and eggs hatched in 30 days and start feeding on mycelium. As these flies mostly attracted to natural light and ultra violet lights that’s why blocking lights, and installing light traps can ease in managing pests.
Fungus gnats
Adult sciarids are long, thread-like antennae and huge, compound eyes on soft insects. They are two-winged, 3-5 mm in size, with females being larger than males and often having 150–170 oval, white eggs in their abdomens, either individually or in clusters. Although adults are not very good flyers, they may cover large areas of the growth surface fast by jumping short distances. Additionally, they “roost” on production facility walls and in confined places. Highly moist conditions are high alert for fungus gnat issues.
Spring tails
Springtails are microscopic, measuring about 1-2 mm in size. They without wings and are commonly observed in huge quantities on the exterior of mushroom houses as well as other moist areas such cracks and gaps in walls. They might get inside the mushroom home through vents, open doors, window screens, or dirt that was carried inside from outside. Springtails can be fed by fungi, algae, and decomposing plant material. Springtails enjoy the mycelium and sporophores of button and oyster mushrooms.
Beetles
Beetles are found to be most dangerous pest that cause harm to mushroom crop abundantly. Their life cycle followed by around 25 days. When female beetles’ lays egg on damaged mushrooms, the hatched babies feed on soft gills of mushrooms. So avoid leaving debris or damaged mushrooms.
Diseases of Chestnut Mushrooms
Consider the following chart for a quick review for diseases, how they are caused, what symptoms are and what the solution is.
| DISEASES | CAUSES | SYMPTOMS | SOLUTION |
| Green mold (Trichoderma spp.) | Lack of fresh air | Masses of green fungus seen inside the bags, musty odor | Fresh air supply should be increased.Spraying with Dithane Z-78 (0.2%). |
| Wet Bubble Disease (Mycogone perniciosa): | Over watering conditions | Mushrooms become soft and slimy watery conditions Water-blisters appear on caps and stem. | Good sterilizationCopper based fungicides used such as copper sulfate. |
| Brown plaster (Papulaspora byssina) | Poor straw and gypsum quality, high moisture in compost mix, | Sandy texture when rubbing against hands. | Proper compositing with proper gypsum addition.Peak heating/pasteurization is highly recommended.Treat with 2% formalin |
| Bacterial blotch (Psuedomonas sp.) | Extra moist conditions | Discoloration pale yellow to brown color | Keep upper surface (caps) of mushrooms dry.Avoid moisture that penetrates in mushroom tissue. |
| Cinnamon mold (Chromelosporium fulva) | Highly moist compost mix, over pasteurized compost, excessive ammonia in compost | Large circular white patches of mycelium that covers the surface of compost. | Soil should be properly sterilized by steam or formaldehyde.Spraying od beds with dithane Z-78 that ensures moisture level. |
How to prepare chestnut mushrooms?
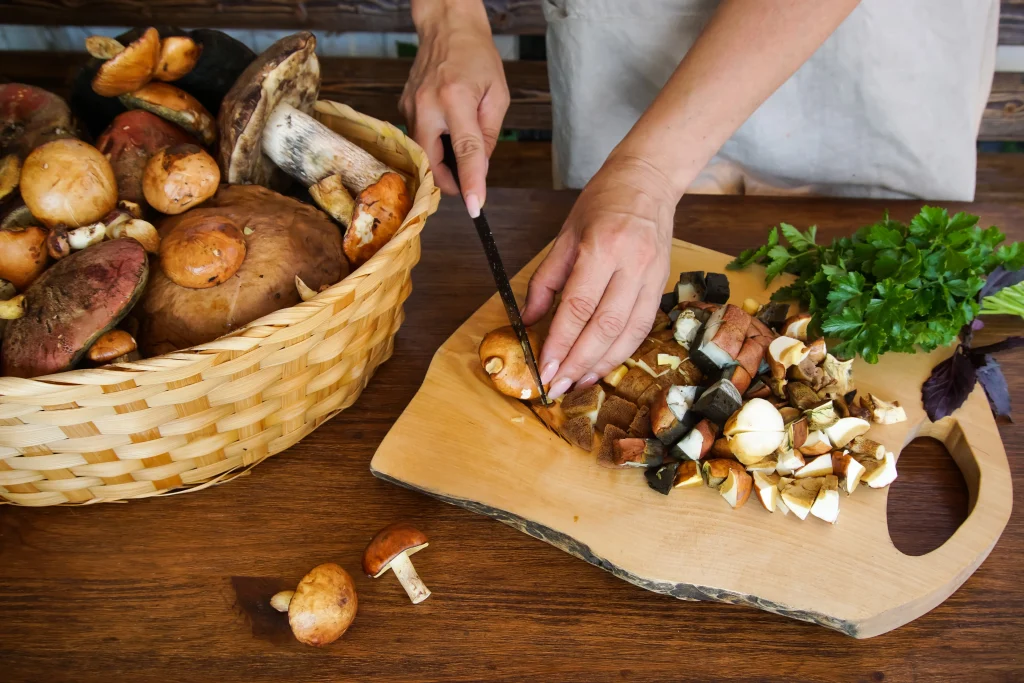
For best flavor and texture, harvest mushrooms at the right time. Once pinning has begun, check grow bags daily. Before the edges curl up, harvest mushrooms when their caps have flattened out. Remove mushrooms by gently twisting them without damaging their pins. Trim the stem with a clean knife.
It is often not necessary to wash chestnut mushrooms harvested from grow bags when grown indoors. It is very easy to cook chestnut mushrooms by removing the very bottom part of the stem, which can sometimes be quite tough. It may be necessary to rinse chestnut mushrooms that you have picked from the wild or from logs in order to remove insects, dirt, and debris. When cleaning mushrooms, use a paper towel to wipe them dry. When handling mushrooms, use new gloves or wash your hands thoroughly after handling them to prevent skin staining. Harvest mushrooms when they are young and tender for best quality. In order to prevent caps from opening fully and dropping spores, they must be harvested timely. Remove mature mushrooms regularly to encourage the growth of new flushes.

Culinary Uses
Chestnut mushrooms are becoming an integral part of everyday meal in Europe now a days. Their unique taste and diversity in flavors making them a good opt for breakfast, lunch and dinner recipes.
Tacos and Soup
Chestnut Mushroom
Risotto
Healthy Food | Delightful Flavor
Health Benefits